Showing posts with label Monday Made It. Show all posts

Monday, July 6, 2015

Monday Made It: July 6


It's Monday Made It!!! So excited to share with you what I've worked on this week. After you finish reading my post be sure to head over here to check out all the other awesome Monday Made Its!

Harry Potter House Point Containers

As I mentioned in last week's post, my classroom theme for this upcoming year is Harry Potter. One of the things I'm working into my classroom management as part of this theme is house points, just like in the HP book. To keep track of the points, each house I bought glass gems in each of the house colors (red, yellow, blue and green).
You can get the gems at most places like Michael's or Hobby Lobby, but I bought mine on Amazon because I didn't like the color choices at my local Hobby Lobby. The brand I found were called Gemnique Glass Mini Gems. While I was at Hobby Lobby however, they were having a 50% off sale on all of their glass containers, so I did buy my 4 containers (they're about 5 inches tall and 3 inches wide) to put the gems into as the kiddos earned them. The bonus is that I only spent $10 all together for all 4 containers! After I brought the containers home, I used my Silhouette Cameo to cut out the crests for each house in vinyl that matched each house's color. Then I applied it to the containers and this is how they turned out:


Harry Potter Name Tags

Like most things for my classroom theme this year, I need to make them since there isn't much really out there in the way of HP classroom decor...including name tags. I went hunting on TpT and on Etsy and found some HP graphics that I liked. The etsy shop I got the graphics from actually has graphics for all sorts of themed graphics so I'll definitely check the shop out again. After I downloaded the graphics, I used photoshop to make the name tags. I had them printed at Staples on cardstock and then laminated them with my Scotch laminator. Now they are ready to go to be labelled with my kiddos names once the school year starts and then attached to their desks. 


Math File Organization System

My last made it this week is more so just a reinvention of my organization system for math, since it was really more just me finding and buying folders to make a new organizational system. At my school, my 4th grade team and I use interactive notebooks for alot of our math instruction. We also have different task card games, tri-folds, center work, and independent work for our kiddos to do as well. This all means I have TONS of master copies of things that are bound to get lost at some point or another. While out shopping, I stumbled upon these nifty file folders:


I thought they were nifty because of the 3 pockets they have on the inside. Now, my school is also a school that uses standards based grading, so I like to keep my materials organized by standards whenever possible, and I thought these would be great for math. I took time this week to go through ALL (yes, an entire year's worth) of math instructional materials, sort and organize them by standard and then make folders for each standard. In each folder, I now have spots for INB pages, assessments, additional support materials/homework practice sheets, and skill review trifolds...basically any and every resource I have for that particular standard. Now, if I have task cards or any games specific to a standard, I just notated that on a post it and stuck that onto one of the pockets as a reminder since I keep all of my task cards and games in one of my storage cabinets in my room. Hopefully this is going to make all of my math planning for the year easier since I'll have basically all of my materials in one place. Here is what one of the files looks like with my materials in it:


I hope you enjoyed these made its as much as I enjoyed sharing them. Don't forget to check out the rest of the made its from this week too (link at the top of the post)!

Also, I'll be posting this week to share about the SDE Differentiated Instruction Conference (since it's held in Las Vegas and I live in Las Vegas, I've gone every year that I've been teaching). If you're going to the conference, leave a comment and let me know!

-- Stephanie

Monday, June 29, 2015

Monday Made It: June 29, 2015


It's Monday! Plus, I finally had some time to get some stuff done and share for Monday Made It! Remember to click this link here after reading to check out all the other awesome Monday Made Its too.

Alot of my Made Its this summer will probably be related to my theme switch for this year. This past year I went with a fish theme, but I've decided to finally take the dive and go with a theme that I know I will be happy with for several years, so I have decided to use Harry Potter as my theme for my room (nevermind that I'm a HUGE HP nerd). So, here are my made it's for this week:

New Class Rules Display

I'm a firm believer that classrooms don't need a ton of rules to function well. In my classroom, I use the acronym ROAR as my class rules - which works well for my kiddos since our school's mascot is a lion. The acronym stands for Respect, Organization, Accountability, and Responsibility. With switching to a Harry Potter theme, my mind immediately went to the educational decrees that Umbridge starts putting all over Hogwarts during HP and the Order of the Phoenix. So I found a way to word my rules so they fit into the way the educational decrees were written and made the actual educational decrees in photoshop. Then I printed them large enough (11x17) from Staples and framed them for display in my room. A note about the frames...I went with frames from Target that were $10 each, which I loved because they are lightweight and the glass isn't actually glass...it's plastic which makes me feel better about what would happen if one of the frames somehow accidentally got knocked off the wall by a wayward 4th grader. Here's a picture of the finished product...

Also, I have the PDFs of the educational decrees here for you to download free if you are interested in using them for your own HP inspired room.


Great Hall Candles

I also wanted my classroom to feel a bit like the Great Hall at Hogwarts. Usually throughout the year I use ceiling hooks as a way to display some of my students work. Since at the beginning of the year I don't have any work to display yet, I thought it would be cool to use the hooks as a way to hang candles from the ceiling so it could look a little like the ceiling in the Great Hall. Obviously hanging actual candles wouldn't work, so I did the next best thing, and broke out my silhouette machine (I LOVE this machine...seriously...best crafting invention ever). I searched through the design store for Silhouette and found a cool candle template. I used some cardstock to cut out the pieces and assembled them using my Xyron machine (another awesome crafting invention) to put an adhesive backing on the drippy wax piece. I used the drippy piece as a way to stick the flame to the main candle part. Once they were assembled I ran the whole thing through my Scotch laminator. In total, I made 30 candles to hang throughout my room. Here's a picture of some of the finished ones.


Hogwarts Express Sign

My HP theme wouldn't be complete without a sign for the Hogwarts Express. I went to Hobby Lobby and they had wood sign pieces and I found one that I thought would work for what I wanted. I broke out my Silhouette machine again to cut the template pieces out and then painted a red base coat on the wood. It needed 2 coats to really cover the way I wanted it to. Then I traced all the template pieces onto the wood and painted them in. Lastly, I used the gold paint to do the trim detail around the sign. I also got a clear sealer to protect the sign and sprayed it on after the pain was dry. Here is how the sign turned out:


4th of July Decor

My last made it isn't school related...it's something I made for my house for 4th of July. There is a nifty little local craft place near me that sells precut wood kits that you can buy and then decorate and assemble them to make cute things. I get stuff from there all the time, and this latest piece I got was Uncle Sam. I wanted to go for a bit of an aged/antiqued look to it, so I stained all the wood pieces first:

I let the wood stain dry for 24 hours before doing anything else so that way there was no risk of the color of the stain leeching into the decorative papers I planned on using. I found some Americana themed papers and cut and trimmed them to fit the different wood pieces. I also painted Uncle Sam's face and hair and added in some ribbon trim for a little added flair. In the end, here is how Uncle Sam turned out:


Well, those are all of my Monday Made Its for this week. Again, don't forget to check out all the other Made Its that have linked up this week (link up at the top of this post).

--Stephanie
Monday, July 21, 2014

Monday Made It

I finally have something that I can share for 4th Grade Frolics Monday Made It Link Up!


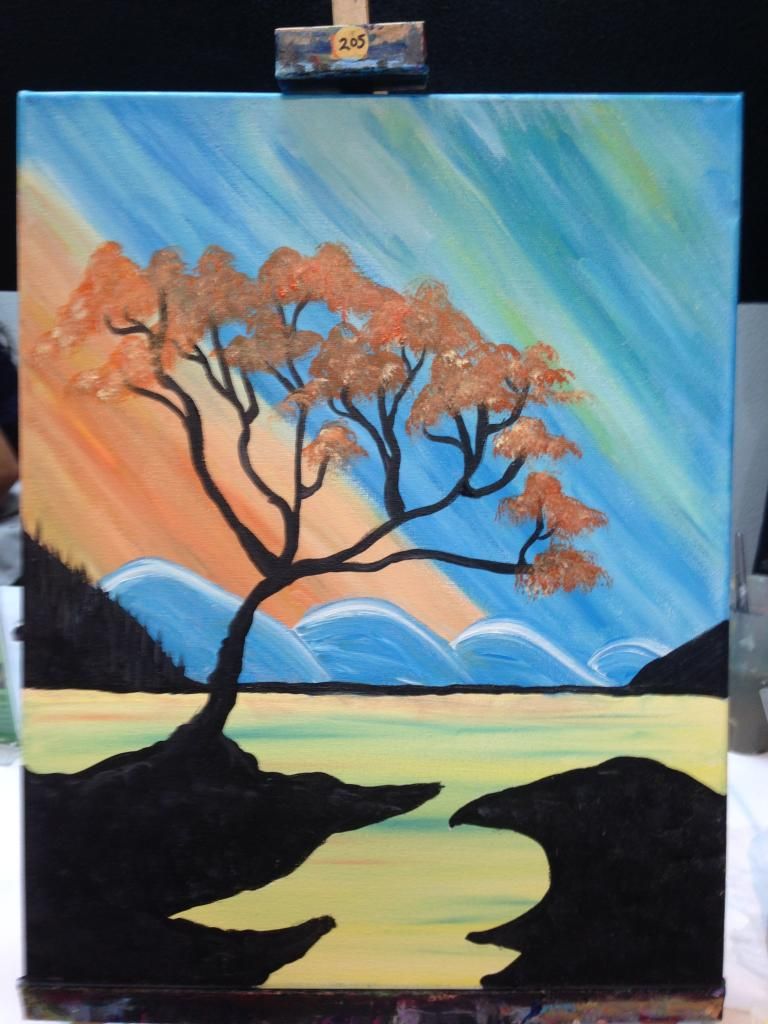
My first made it is from the art class I went to on Friday. I went to a Design & Wine class and learned how to make a pretty cool painting, and was surprisingly pleased with how mine turned out:

after the basic background was done.

mountains added in.

the completed painting.


Now for my Made It for school. My school uses "Have You Filled a Bucket Today?" as part of it's anti-bullying program. Since I'm doing a nautical/beachy/under the sea type theme this year, I was super excited when I found the Carson Dellosa bucket cut outs at Lakeshore. I've decided to make one for each kid in my class. Each will hold compliments/kind thoughts/etc that other students have written to them.


1. Get what you need - xacto knife, glue, library pockets, cutting mat, and the bucket cut outs

2. Cut along where the "shadow" of the inside of the bucket is.

3. Make sure the slit is completely cut...make sure you check it, sometimes there are a few spots that aren't cut through all the way.

4. Figure out placement for the library pocket. I found it was helpful to mark the corners so I knew where to place it after I put on the glue.

5. Put the glue on. Not too much though...just a little in the top corners, below the top of the pocket, and towards the bottom so that way the pocket totally sticks to the bucket. 

6. You can see that the corners of the pockets overhang...thats okay. It gets fixed in step 7

7. Trim the overhang from the pockets. 

8. Test out the pocket!

The last thing I do want to do with these is to laminate them so they hold up all year. After they are laminated, I'll just use my xacto knife to recut the slit for the pocket.

So...what have you made this week? Check out the other's who have linked up for some awesome ideas, and leave a comment that tells me all about your own!


Monday, July 15, 2013

Meeting Staff, Ron Clark, and Monday Made Its!

It's been a busy week and things aren't going to slow down any time soon as my summer free time starts to wind down at far too fast a pace. On Saturday my principal invited me and the rest of my school staff to her house for a get together. We're all basically new at our school this year (only about 8 teachers stayed from last year) and my principal thought it would be nice for everyone to meet each other before this week since about 20 of us are attending a Differentiated Instruction conference this week together. We had a great night at the get together. We all brought a different dish and I have to say I am super excited about working with the rest of the teachers at my school. While we were there we worked on some collaborative art projects that we'll be putting into our teacher's lounge. AND we also got our tax exempt forms for when we shop for work as well as our reimbursement forms (our school will reimburse each teacher for $200 worth of purchased). My principal also told us that while our official Teacher Report Date is August 14th, we can start setting up our classrooms on August 1st (which is only 16 days away, hence my starting to go into panic mode about getting everything done in time).

Today is the first day of the Differentiated Instruction Conference I'm attending. The kick off event is at 5:00 and it is the conference keynote speech. The speaker is Ron Clark and afterwards he's doing a book signing. I'm excited about it and have both of his books, so I'm hoping to get him to sign them after the event tonight. I'll blog about each day of the conference and share all the awesome info and ideas I get while I'm there.

Now for my....


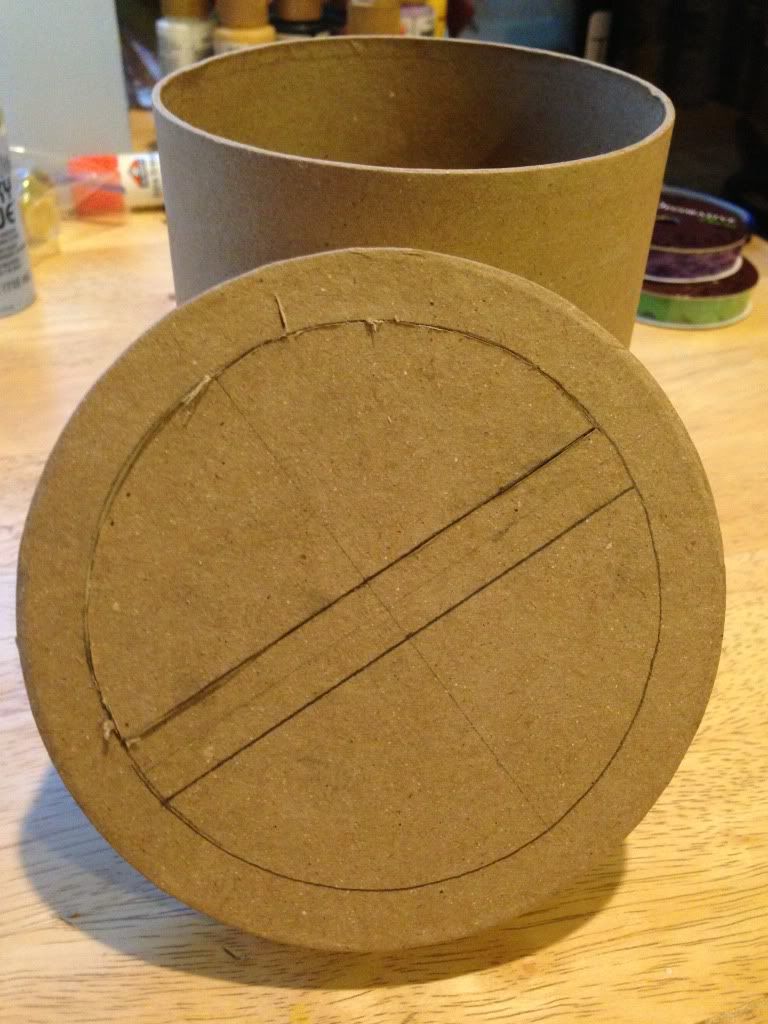
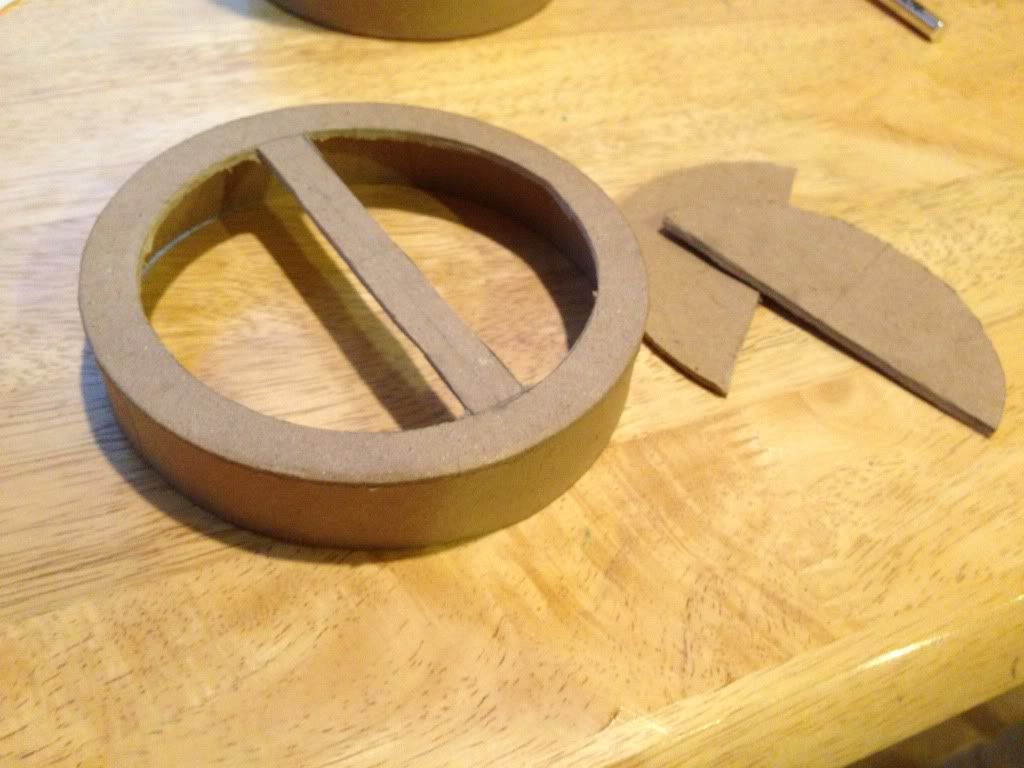
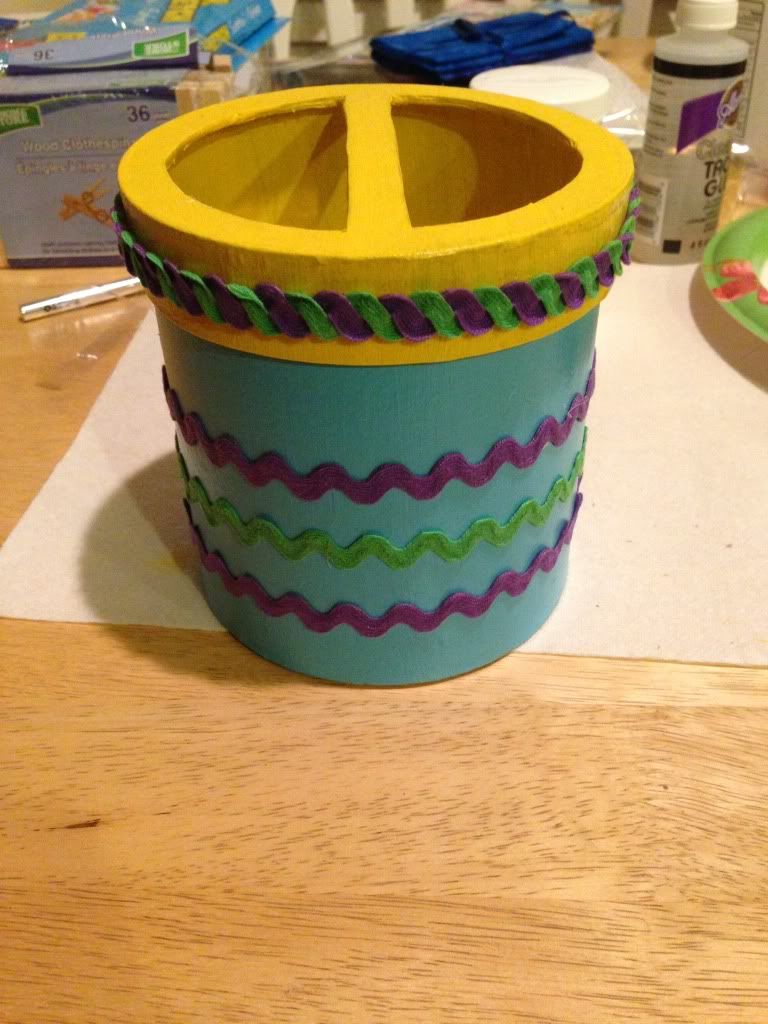
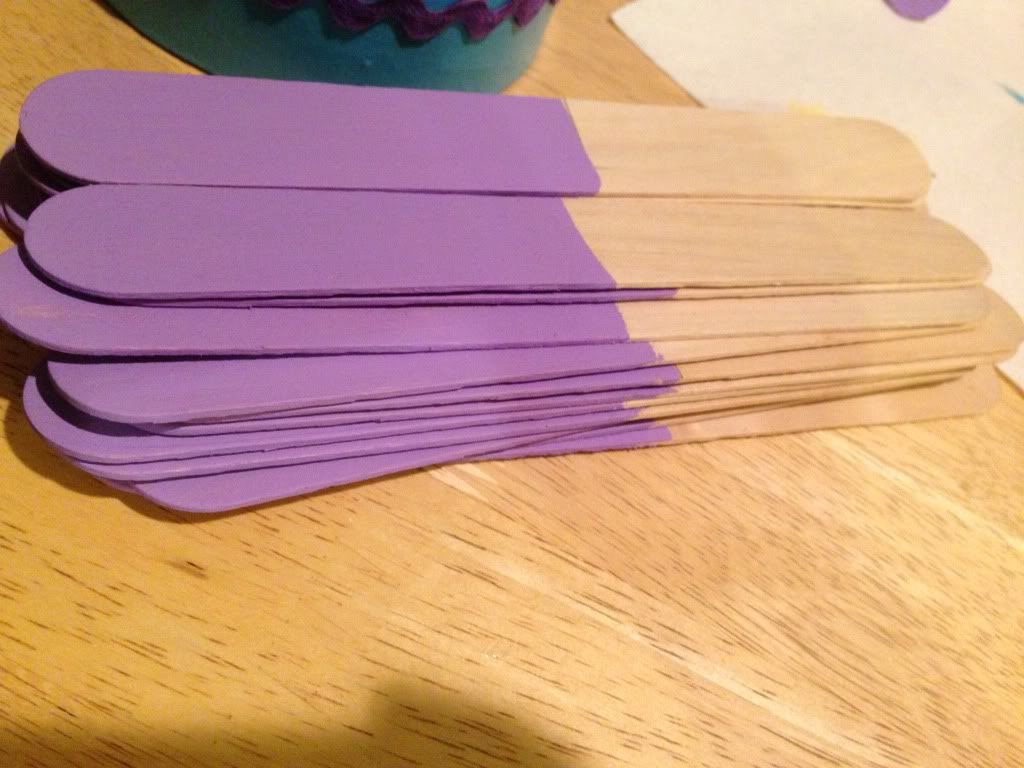
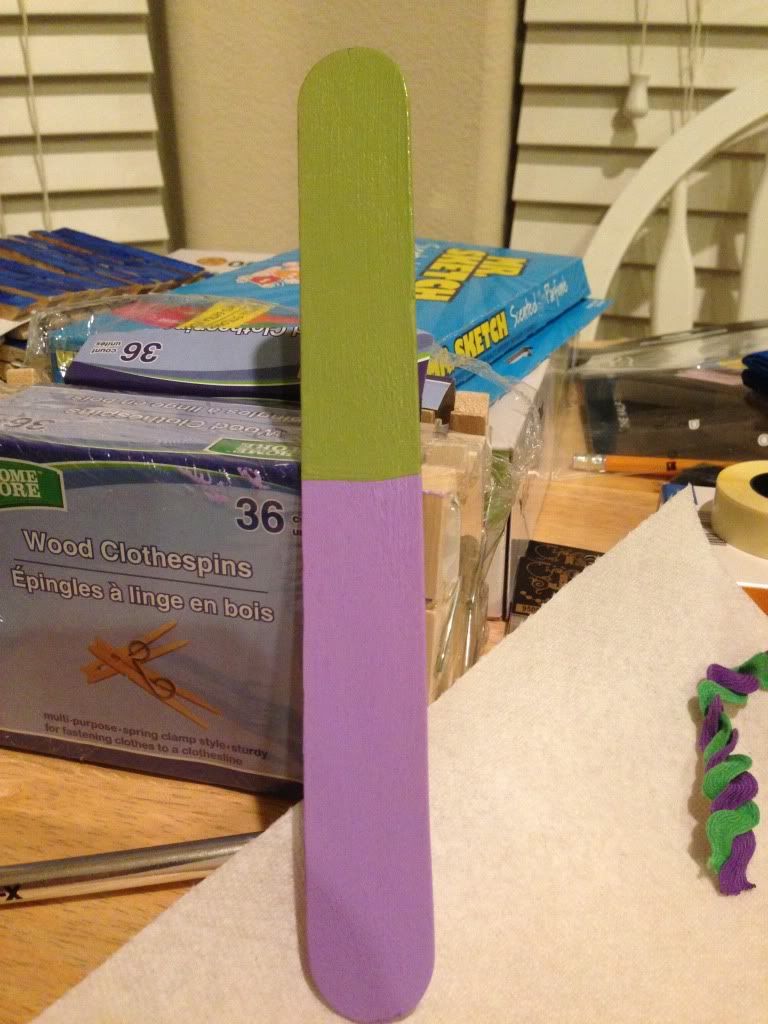
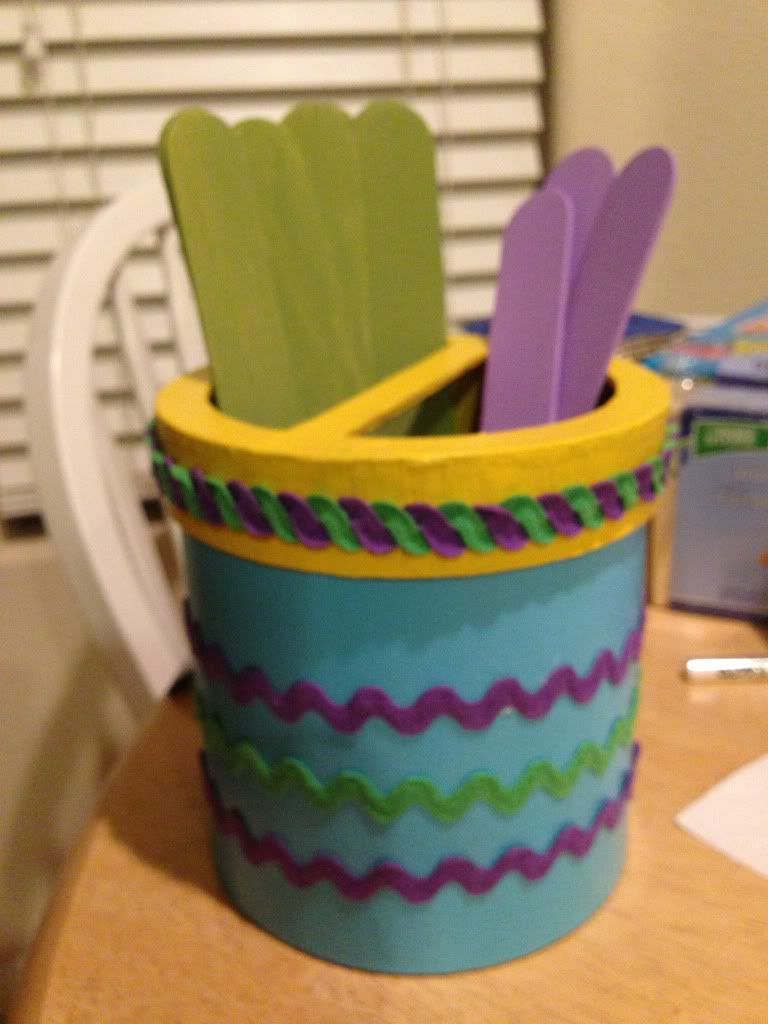
My first made it is: Pick Sticks Container. Here is how it turned out...


Sorry that the last picture came out a little fuzzy... I blame my iPhone. To make my pick stick container all I needed to get was the paper mache container and the popsicle sticks (I bought the jumbo sized ones so they would stick out of the container enough). I already had the rick rack and paint at home. All I did was sketch out the half circles on the top and then used an Xacto knife to cut them out (go slow so you don't cut yourself)... this way I can separate the sticks that I've already picked from the ones I can still choose from. I also hot glued to top of the container to the base. All I have to do now is just write my student's names on them once I get my class roster.


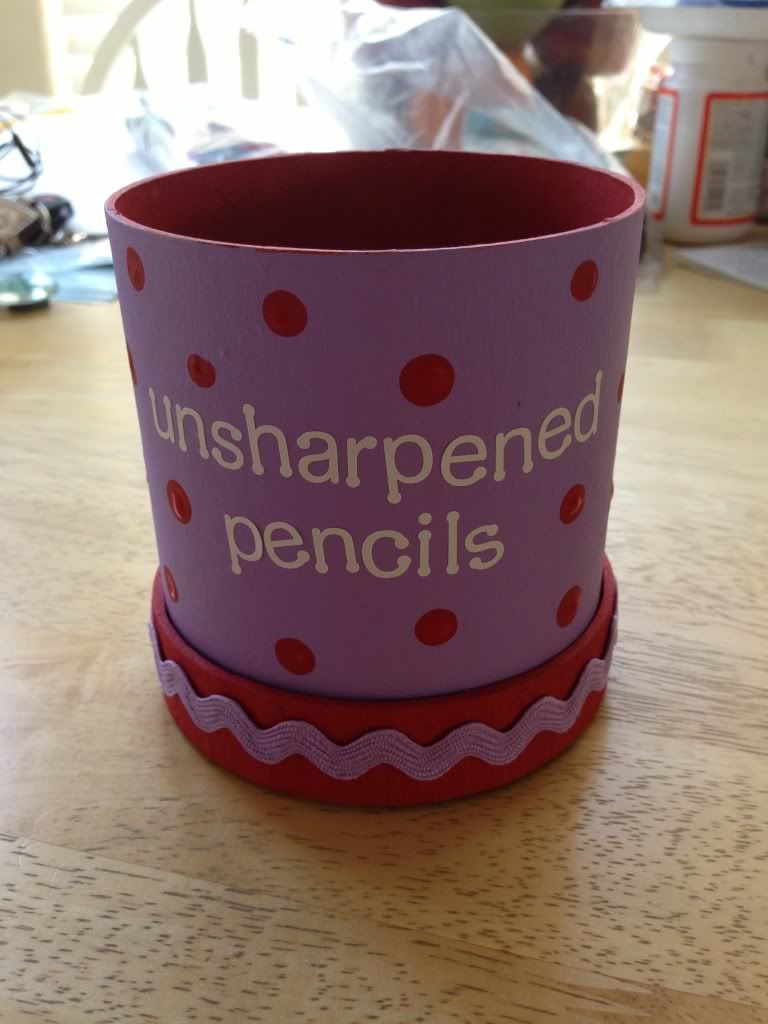
My second made it is my Unsharpened Pencils Container....

I also made this using one of those paper mache containers...it's just a smaller one than my Pick Sticks one. I didn't make one for my sharpened pencils because I plan on ordering this from Oriental Trading next week...

It's a set of 144 pencils and they come in that nifty dispenser. My plan is to keep sharpened pencils in this and the unsharpened ones in the container I made. 


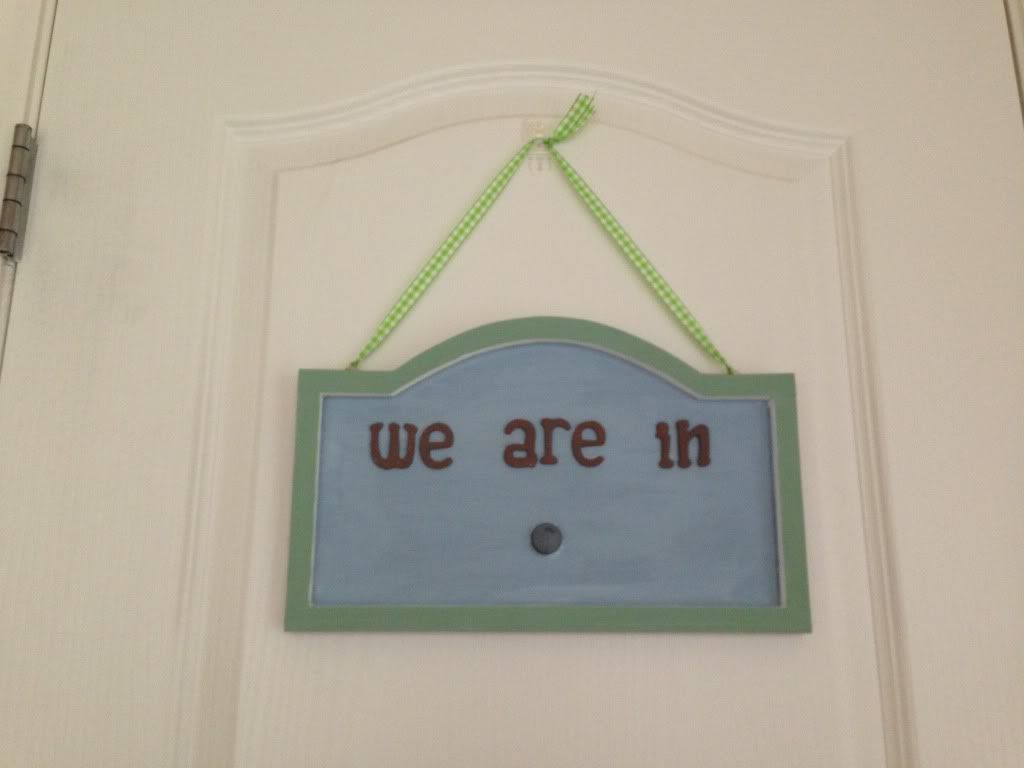
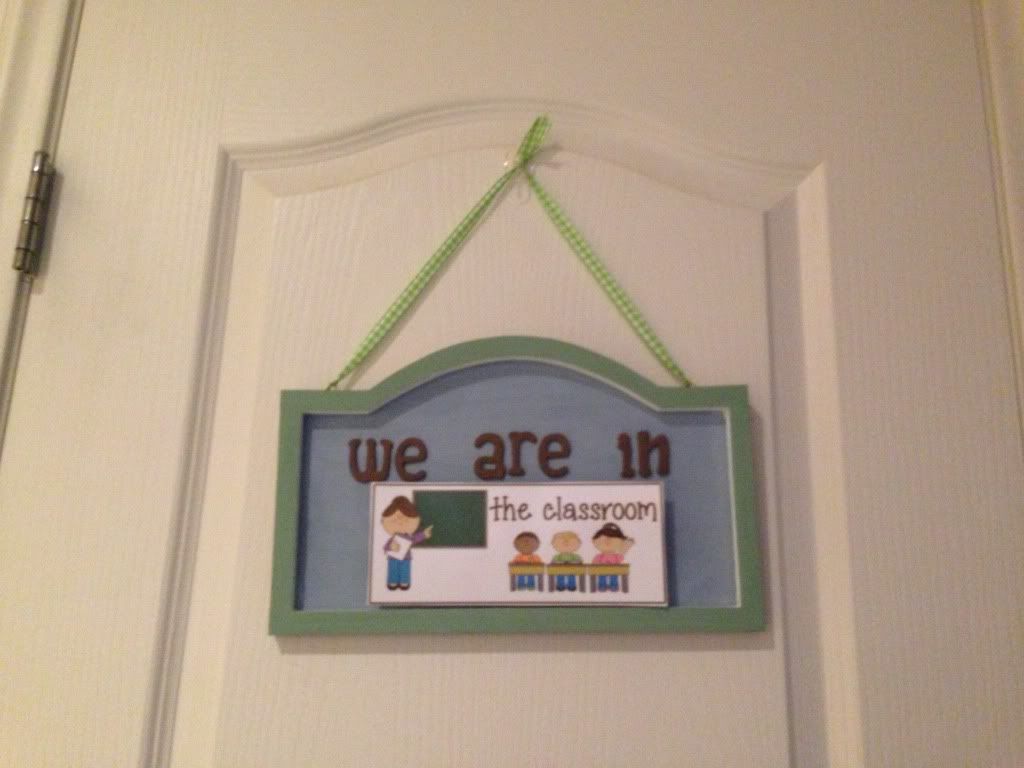
My third made it is my Where Are We board. I plan on keeping it hung up next to the door to my classroom so if specialists, parents or other staff need to know where my students are at any given time, they'll know. A while back, I made these Where Are We cards (I just realized I still need to make one for Spanish) that go with the board (I made these using graphics from My Cute Graphics)...


And here is the board I made....


As a note...magnets + craft glue + laminated card stock do not work well together. The magnets fell right off the cards even once the glue dried so I used velcro dots I had instead (I just put it on top of the magnet on the board and in place of the magnets on the cards).  Here is what the board looks like with one of the cards on it...


So those are my Monday Made It's for this week. Make sure you stop by 4th Grade Frolics and check out all the other MMIs too! I'm off to go figure out what I'm wearing to the conference this week... 


Monday, July 8, 2013

Monday Made Its and an Erin Condren Update!

I can't believe it's already July 8th. I feel the time I have left to get ready for the school year slipping through my fingers...especially since I won't have time next week since I'm going to the National Conference on Differentiated Instruction. (I'll be blogging about my sessions each evening and am looking forward to sharing all the awesomeness with you guys). This week I have 3 MMI to share with you all...


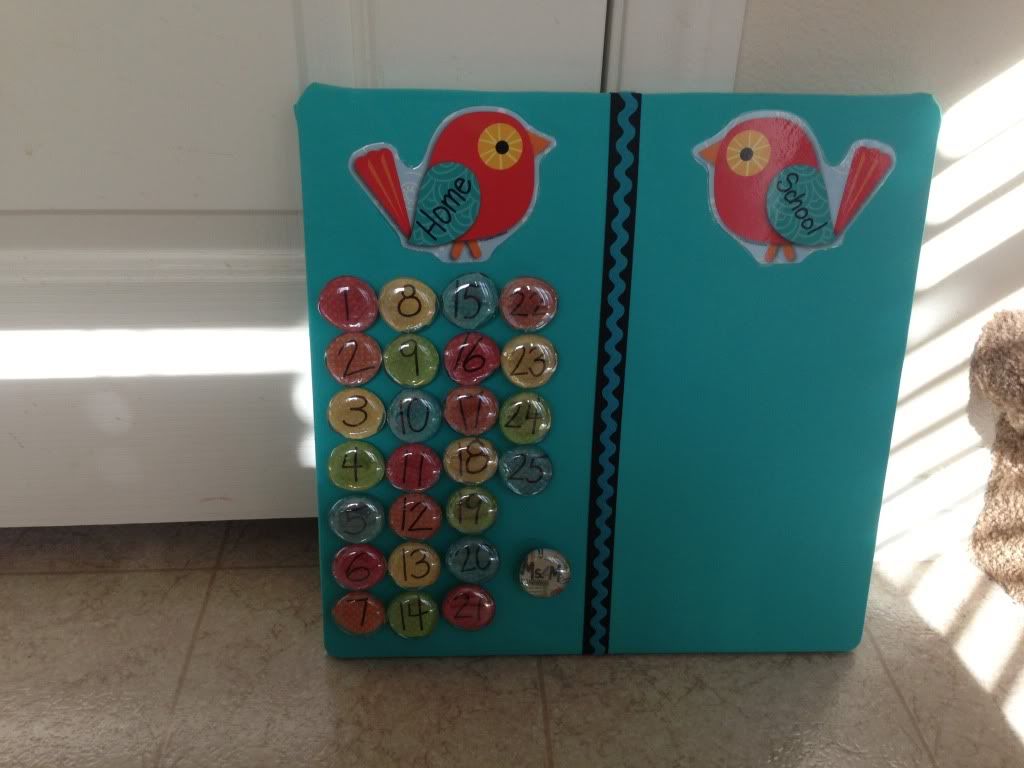
Monday Made It #1: Attendance Board
A few weeks ago I did a blog post about my magnets that I made for my students. Each of my students will have a magnet with their assigned number on it and I plan on having them use these for attendance each day. I went to Walmart this week and found a magnetic white board that was the perfect size for my attendance board that I wanted to make. The board I found is 14x14. I Also stopped over at Michaels and got some black twill ribbon to use for this project. I already had the fabric and rick rack at home. Originally I was going to use scrapbook paper and a cardstock border for this project but then when I looked at the back of the board, I realized it would be easier/more efficient to use fabric (the back of the board has thick corrugated cardboard that I was able to staple into easily). The bonus to using the fabric is that in the future if/when I choose a new classroom theme, I can remove the fabric more easily than I would the paper and recover the board to match. All I had to do to make this board was cover the board with the fabric and attach it with staples in the back. Then I attached the black ribbon the same way (this whole project was made with staples practically), and then I attached the rick rack over the ribbon for an extra bit of cuteness. Then, all I did was grab two of the birds from my set of classroom theme materials and used some mod podge to attach them to the fabric. Now I have an attendance board all ready to go. 

Monday Made It#2: Braggin' Bird Clips
So last week I read the MMI that Miss Nelson did on her blog (read it here) about the brag tags that she had made. I instantly loved what she had made, especially since I was still trying to sort out my classroom reward system and decided these would be a great idea for my 4th graders. I bought the set that Miss Nelson was selling in her TpT store and I LOOOOOOOVE them. I got a set that came with 10 custom designed brag tags, and now I actually can't wait to see my kiddos start earning them. I needed to make something for my students to keep their tag chains in the classroom, and I decided to use clothes pins. I know you all have probably seen the awesome clips that many of my fellow bloggers have made by mod podging scrapbook paper onto them, and that is similar to what I've done...I just did it with a twist and used fabric instead of paper. Here's the steps to how I made them:
Step 1: Get your materials (mod podge, clothes pins, fabric, foam brush)
Step 2: Put a good coat of mod podge on the clothes pin
Step 3: Put the pin glue side down onto the fabric. (I found it helps after the pin is on the fabric to run your fingers over the fabric and make sure it's good and glued to the pin).
Step 4: Cut off all the excess fabric around the pin. (You could use an exacto knife, but I found a decent pair of scissors worked just fine)
Step 5: Put a coating of mod podge over the fabric to make sure it's good and secured to the pins.
Step 6: Attach the bird(or whatever image/item) to the pin. (This one has my mom's name on it...she saw what I was making, thought it was cute and asked for one with a magnet on the back so she could put it on her fridge)

Now, with these, you can either use a magnet on the back, or get some glue dots and thumb tacks depending on if you're putting them on a bulletin board or a magnetic surface. I'm not sure yet where in my room I'll be displaying mine, so I'm waiting on that part until I get into my classroom next month (I'll post pics once I finally decide where to put them).


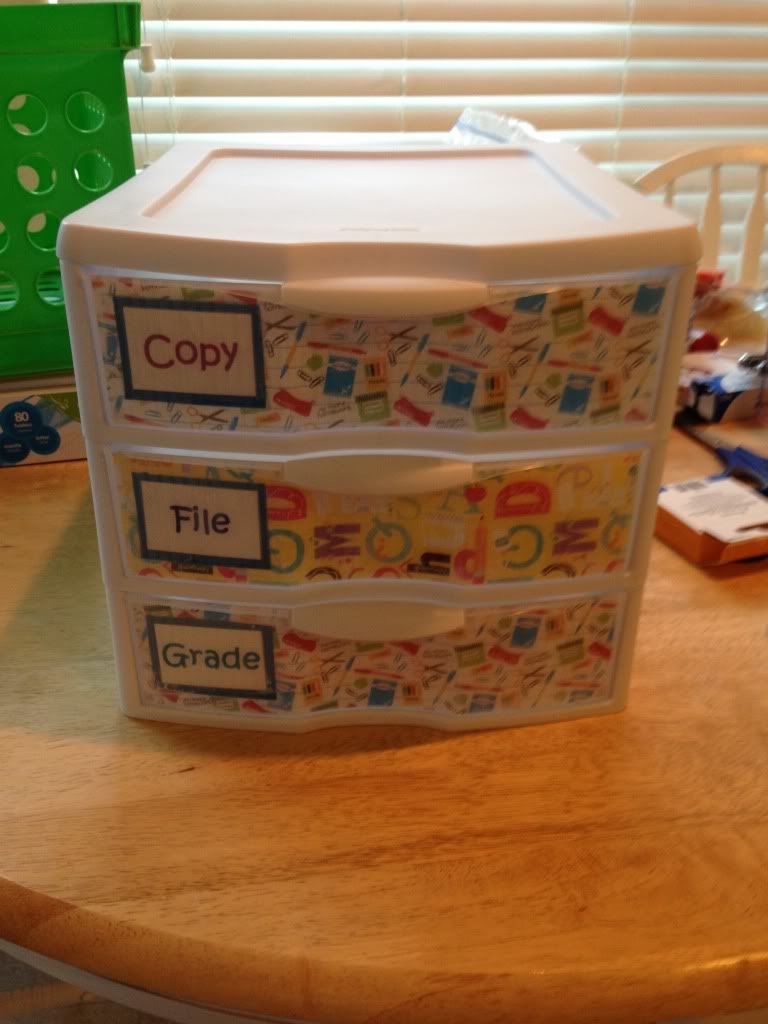
Monday Made It #3: Copy/File/Grade Drawers
A while back, Fun In Room 4B did a MMI post about her Copy/File/Grade Drawer. I thought it was a nifty idea and decided to make one of my own. I had left over scrapbook paper from when I had made my teacher toolbox, and decided to use it so my Copy/File/Grade drawer and my toolbox would coordinate (matching/coordination makes my OCD happy). This is how my drawer turned out....

I hope you all enjoyed my MMIs. I had fun making them and still have a TON of other things to make and do before August begins and I have to start getting my classroom ready. Be sure to head over to 4th Grade Frolics and check out all the other blog posts for some great ideas!

Now for an update on my Erin Condren Lesson Planner... I posted last time how I had received the planner I ordered (Yay happy news) but that it had a severely dented coil so it couldn't even really open all the way, thus rendering it useless (Boo sad news). Let me just take a moment and say how amazing the people over at Erin Condren are. They were super helpful with taking care of the problem and ordered a reprint for me for the planner. They even put a rush on it so I would get it ASAP since I mentioned I needed it within the next few weeks to start getting ready for the school year AND they didn't even ask me to send back the damaged one, so I plan on attempting to hold on to it so I can make use of the stickers and labels and what not that came in it (waste not want not!). What's even better is that I got my shipping notification today that my reprinted planner has shipped, which for me, means that I should probably get it tomorrow at some point (I originally payed for 3 to 5 day shipping, plus I live in Vegas which is only 4 to 6 hours away from where Erin Condren is located so it doesn't take long for delivery anyway). I'll do a blog post with pics and whatnot once I get my new (and hopefully damage free) planner.

For now, I'm off to make another trip to Hobby Lobby to pick up the ball chain for my brag tags and possibly get some fabric for my bulletin boards too. 


Monday, July 1, 2013

Monday Made It!


I'm linking up again with 4th Grade Frolics for Monday Made It! I love this link up each week (even though I am super FAIL at doing my home made its...I think it's because I'm in super freak out mode over how much I still need to do for school)... I always get  so many great ideas from everyone who joins in, so make sure you check out the other blog posts!

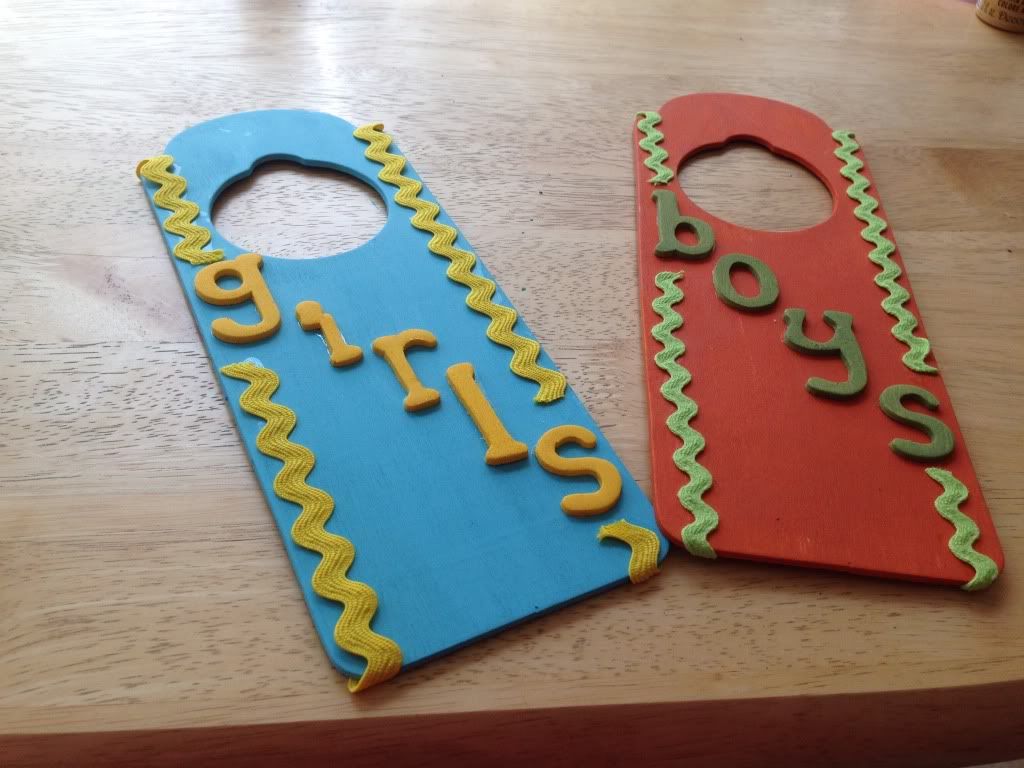
Made It #1: Bathroom Passes:


So remember the Shh We're Testing door hangar I made last week? When I bought the door hangar to make it, I bought a bunch of them at once, especially since they only cost 0.79 each! This week I took two of them and used them to make my bathroom passes for my kiddos just by adding a little paint, some wood letters, and some rick rack (I LOVE rick rack...it's such an easy way to add a little cutsie-ness to a craft...plus I've used it in several of my projects for my classroom). Now, I'll be teaching 4th graders and my room is literally no more than 20 feet from the bathrooms, but I still want them to use the passes. I really don't like having a bunch of kids out of the room all at once, so my policy is only 1 boy and 1 girl out to the bathrooms at a time. (This policy comes from the experience of learning the hard way that 3 boys out to the bathroom at once results in wet wads of TP getting thrown all over the bathroom and hallways) The passes will be hanging on the wall near the door, so my students will know to check the passes first before asking about using the bathroom, because if the pass isn't on the wall, they'll know my answer will be no. Now, I plan on eventually making a second set of the passes for the bathroom since I know before the end of the year these will inevitably break or "grow legs and disappear". But for now, the one set will do just fine since my To Do list is still several feet long.


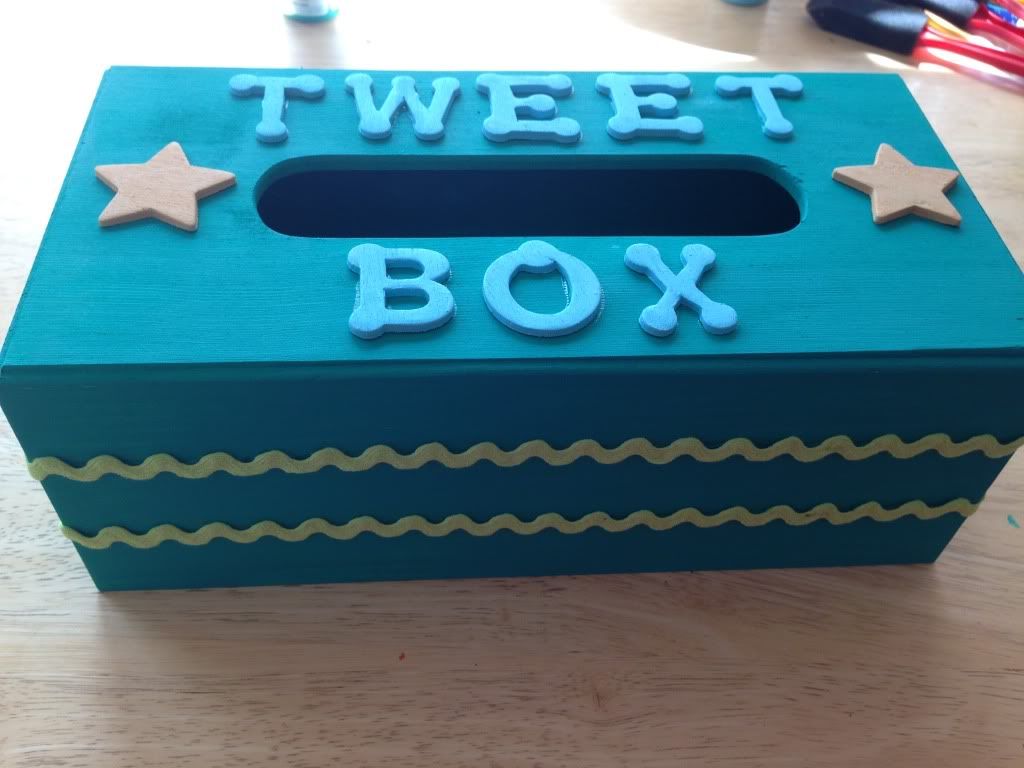
Made It #2: The Tweet Box

This idea came out of my classroom theme. I'm using the Carson Dellosa "Boho Birds" for my class theme this year. I also wanted to have something for the kids each week to tie into character education, and one of the bulletin board sets came with a resource guide that had this in it:
And that's when it it me! Tweets! I came up with the idea that the kids could use these little sheets as a way to compliment/say something nice about their classmates. I plan on focusing on different traits each month (friendship, honesty, respect, kindness, etc) and the kids can use the tweets as a way to point out when they see their fellow classmates following the traits, or if they want to give a general compliment as well. The class I student taught with did something similar to this with their character education program and it was amazing. The kids in the class all got along really well and there were hardly ever any fights or issues among them (granted there were still kids who would act up from time to time, but there was practically ZERO bullying/teasing in that class). 

So now that I had my Tweets the kids were going to write, I needed someplace they could put them. That's where my trip to Hobby Lobby came in handy. I was walking in the aisle with all the wood stuff (the aisle where I found my handy dandy multi-use door hangars), and saw unfinished wood tissue boxes. I thought that one of them would be perfect cause the kids could drop the Tweets in there and the bottom slides out so I can open the box each week and read the tweets that are in there. 

I plan on doing a Tweet read with my kids each Friday. I think it would be a nice way to wrap up each week  for the kids, and after the Tweets are read, I have a folder I plan on storing them in so I can use them as part of an end of the year gift for the kids... I plan on putting little memory books together for each kid and in it I'll include all the tweets from the year that their classmates wrote about them. 

So as for how I made the box... it was basically the same as the bathroom passes...some paint, wood letters/shapes, and of course... some rick rack for an extra fun little accent. 

So I hope you all enjoy my made its. I'm off to go check out the other Made Its everyone else posted about!


09 10 11 12
Blogging tips