
I can't believe it's already July 8th. I feel the time I have left to get ready for the school year slipping through my fingers...especially since I won't have time next week since I'm going to the National Conference on Differentiated Instruction. (I'll be blogging about my sessions each evening and am looking forward to sharing all the awesomeness with you guys). This week I have 3 MMI to share with you all...
Monday Made It #1: Attendance Board
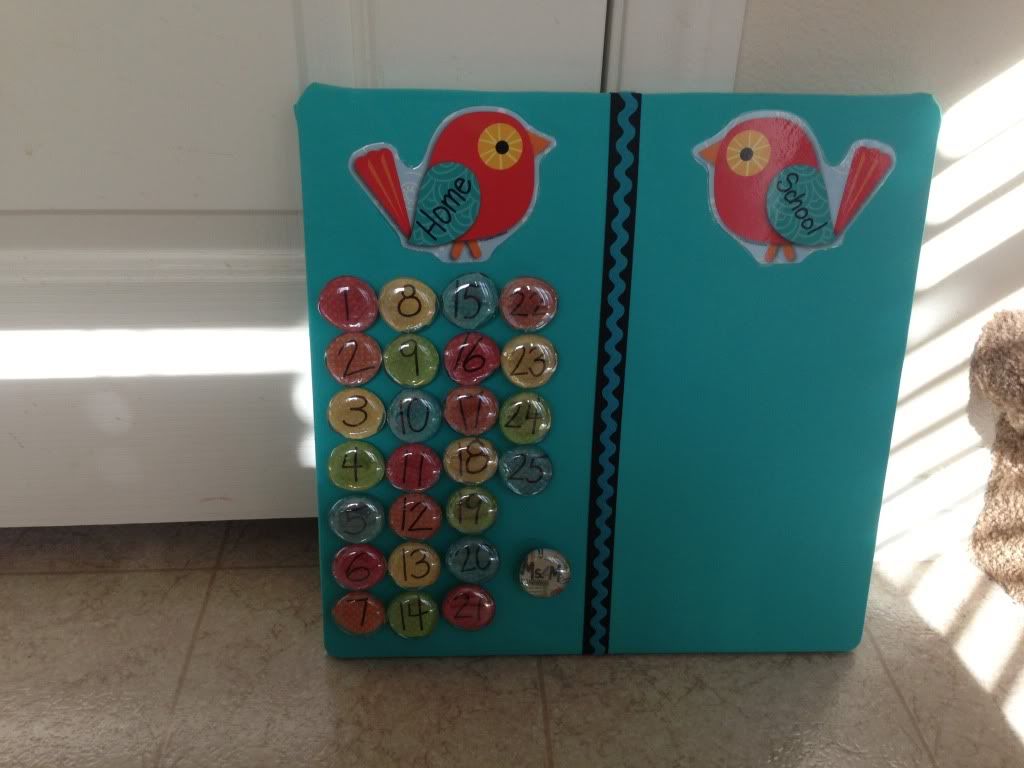
A few weeks ago I did a blog post about my magnets that I made for my students. Each of my students will have a magnet with their assigned number on it and I plan on having them use these for attendance each day. I went to Walmart this week and found a magnetic white board that was the perfect size for my attendance board that I wanted to make. The board I found is 14x14. I Also stopped over at Michaels and got some black twill ribbon to use for this project. I already had the fabric and rick rack at home. Originally I was going to use scrapbook paper and a cardstock border for this project but then when I looked at the back of the board, I realized it would be easier/more efficient to use fabric (the back of the board has thick corrugated cardboard that I was able to staple into easily). The bonus to using the fabric is that in the future if/when I choose a new classroom theme, I can remove the fabric more easily than I would the paper and recover the board to match. All I had to do to make this board was cover the board with the fabric and attach it with staples in the back. Then I attached the black ribbon the same way (this whole project was made with staples practically), and then I attached the rick rack over the ribbon for an extra bit of cuteness. Then, all I did was grab two of the birds from my set of classroom theme materials and used some mod podge to attach them to the fabric. Now I have an attendance board all ready to go.
Monday Made It#2: Braggin' Bird Clips
So last week I read the MMI that Miss Nelson did on her blog (read it here) about the brag tags that she had made. I instantly loved what she had made, especially since I was still trying to sort out my classroom reward system and decided these would be a great idea for my 4th graders. I bought the set that Miss Nelson was selling in her TpT store and I LOOOOOOOVE them. I got a set that came with 10 custom designed brag tags, and now I actually can't wait to see my kiddos start earning them. I needed to make something for my students to keep their tag chains in the classroom, and I decided to use clothes pins. I know you all have probably seen the awesome clips that many of my fellow bloggers have made by mod podging scrapbook paper onto them, and that is similar to what I've done...I just did it with a twist and used fabric instead of paper. Here's the steps to how I made them:

Step 1: Get your materials (mod podge, clothes pins, fabric, foam brush)
Step 2: Put a good coat of mod podge on the clothes pin
Step 3: Put the pin glue side down onto the fabric. (I found it helps after the pin is on the fabric to run your fingers over the fabric and make sure it's good and glued to the pin).
Step 4: Cut off all the excess fabric around the pin. (You could use an exacto knife, but I found a decent pair of scissors worked just fine)
Step 5: Put a coating of mod podge over the fabric to make sure it's good and secured to the pins.
Step 6: Attach the bird(or whatever image/item) to the pin. (This one has my mom's name on it...she saw what I was making, thought it was cute and asked for one with a magnet on the back so she could put it on her fridge)
Now, with these, you can either use a magnet on the back, or get some glue dots and thumb tacks depending on if you're putting them on a bulletin board or a magnetic surface. I'm not sure yet where in my room I'll be displaying mine, so I'm waiting on that part until I get into my classroom next month (I'll post pics once I finally decide where to put them).
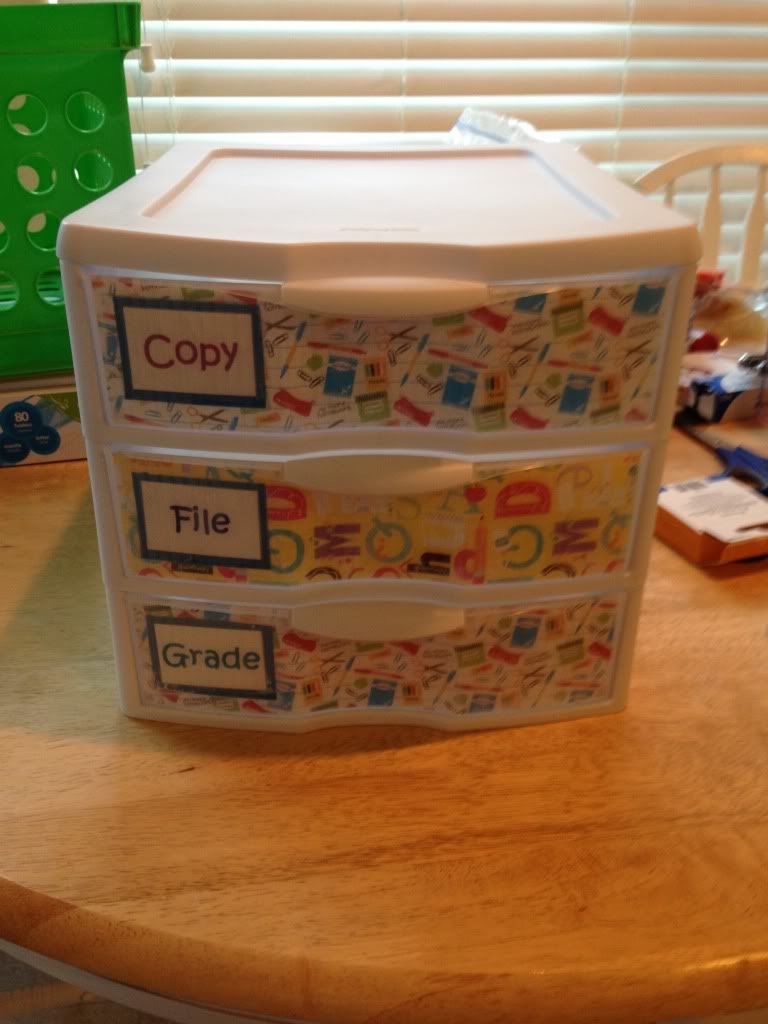
Monday Made It #3: Copy/File/Grade Drawers
A while back, Fun In Room 4B did a MMI post about her Copy/File/Grade Drawer. I thought it was a nifty idea and decided to make one of my own. I had left over scrapbook paper from when I had made my teacher toolbox, and decided to use it so my Copy/File/Grade drawer and my toolbox would coordinate (matching/coordination makes my OCD happy). This is how my drawer turned out....
I hope you all enjoyed my MMIs. I had fun making them and still have a TON of other things to make and do before August begins and I have to start getting my classroom ready. Be sure to head over to 4th Grade Frolics and check out all the other blog posts for some great ideas!
Now for an update on my Erin Condren Lesson Planner... I posted last time how I had received the planner I ordered (Yay happy news) but that it had a severely dented coil so it couldn't even really open all the way, thus rendering it useless (Boo sad news). Let me just take a moment and say how amazing the people over at Erin Condren are. They were super helpful with taking care of the problem and ordered a reprint for me for the planner. They even put a rush on it so I would get it ASAP since I mentioned I needed it within the next few weeks to start getting ready for the school year AND they didn't even ask me to send back the damaged one, so I plan on attempting to hold on to it so I can make use of the stickers and labels and what not that came in it (waste not want not!). What's even better is that I got my shipping notification today that my reprinted planner has shipped, which for me, means that I should probably get it tomorrow at some point (I originally payed for 3 to 5 day shipping, plus I live in Vegas which is only 4 to 6 hours away from where Erin Condren is located so it doesn't take long for delivery anyway). I'll do a blog post with pics and whatnot once I get my new (and hopefully damage free) planner.
For now, I'm off to make another trip to Hobby Lobby to pick up the ball chain for my brag tags and possibly get some fabric for my bulletin boards too.

I love the idea of a magnet board for attendance! That would be great to use for my homeroom next year. I just made a magnet board today and was trying to decide what to use it for.
ReplyDeleteJamie
Sixth Grade Tales
Follow my new Facebook page
Thanks for commenting! I first saw the idea for the magnet board for attendance in a 4th grade classroom when I was substituting this year before I entered the realm of teaching blogs and then once I started reading (and then more recently blogging myself) I saw them on a few other teachers' blogs too. I will tell you in my experience as a substitute, the attendance board was the easiest attendance method I ever had to use.
DeleteYour clothes pins turned out great. Love the idea of fabric. I'm not a glitter girl, but fabric hmmm. I have come quilt scraps that would work perfectly. http://mrsbrownthebookworm.blogspot.com/
ReplyDeleteThanks for commenting! I'm not huge on glitter either, and I was too tired the other day to go to the craft store to pick up some new scrapbooking paper for the clothes pins. I had the fabric lying around and its the perfect compliment to the colors in the theme I'm using for my classroom, so I decided to give using the fabric a shot. I'm glad I did, plus, there are soooo many more choices now for in the future when it comes to making the clothes pins depending on the theme you use in your room!
DeleteI LOVE your attendance board idea! What size font did you use for your numbers? Or are they just handwritten in?
ReplyDeleteThanks!
Thanks for commenting! I handwrote the numbers using a black sharpie. When I made the magnets, I cut the little circles out of scrapbook paper, then I wrote the numbers on them and then used mod podge to attach them to the glass gems before gluing on the magnet pieces.
ReplyDeleteLove all of your monday made its. Thanks for the shout out. I'm almost done customizing all the tags that were ordered last week :) Thanks for the wonderful feedback
ReplyDelete